How to Use Gypsum Board Mesh Tape for Perfect Joints?
When working with drywall, achieving seamless joints is crucial. Gypsum Board Mesh Tape plays a vital role in this process. This tape is designed to create strong, long-lasting joints, making it an essential tool for both professionals and DIY enthusiasts.
Using Gypsum Board Mesh Tape can transform your project. It promotes adhesive strength and ensures that joint compound adheres well. However, many users overlook proper application techniques. A rushed job can lead to unsightly seams and cracking. Careful attention to detail is paramount.
It's easy to assume that simply applying the tape will guarantee perfection. In reality, mastering the application process takes practice. Factors such as tape alignment and compound consistency can greatly affect the final outcome. Reflecting on these aspects will improve your results and elevate your craft.
Understanding Gypsum Board Mesh Tape and Its Benefits
When it comes to drywall installations, gypsum board mesh tape plays a crucial role. Its unique design allows for strength and flexibility, making it ideal for joints. Unlike paper tape, mesh tape is not prone to tearing. This can lead to smoother finishes and reduced cracking over time. Properly applied, it creates durable seams, offering long-lasting results.
Tips: Always clean the joint surface before applying tape. This ensures a strong bond and prevents future issues. Take your time with the application. Rushing may lead to uneven surfaces or air pockets. A little patience goes a long way.
Additionally, mesh tape is moisture-resistant. This makes it suitable for high-humidity areas. However, it's essential to understand that its application requires precision. Overlapping the tape can cause ridges, so careful placement is vital. Use a good quality joint compound to achieve the best smooth finish. As with any project, practice makes perfect. You may not get it right the first time, and that's okay.
Preparing the Surface for Applying Mesh Tape
Preparing the surface for applying mesh tape is crucial for achieving perfect joints. Start by ensuring the drywall is clean and dry. Dust and debris can hinder the adhesion of the tape. Wipe the surface with a damp cloth or sponge. This simple step removes particulates that may cause issues later.
Next, inspect the joints for any imperfections. Noticeable gaps or uneven areas can be problematic. Consider using a joint compound to fill deep gaps. Apply it smoothly and let it cure completely. This can take time, but rushing can lead to uneven surfaces. After drying, sand the area lightly. Make it smooth, but it doesn't need to be perfect yet.
Once everything is prepped, you can apply the mesh tape. Ensure you apply it evenly across the seams. If you notice any areas peeling or bubbling, you may need to adjust your technique. Achieving a flawless finish takes practice and patience. It's normal to have to redo sections to get it just right. Be mindful of your environment, too; humidity can affect drying times and adhesion.
Techniques for Properly Applying Gypsum Board Mesh Tape
Applying gypsum board mesh tape is essential for smooth joints. Proper technique can make a significant difference in finishing quality. The American Gypsum Association notes that improper taping can lead to cracks and uneven surfaces. It's crucial to ensure a good bond between the tape and the joint compound.
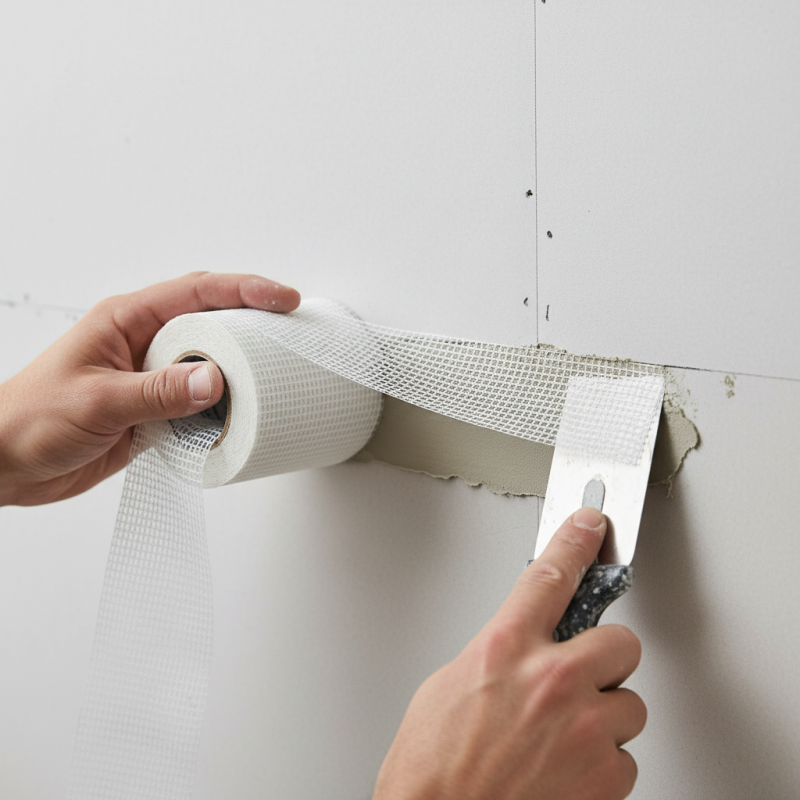
Begin by cleaning the area where you will apply the tape. Dust can hinder adhesion. Then, apply a thin layer of joint compound over the joint. Place the mesh tape onto this layer while it is still wet. Press firmly to eliminate air bubbles. Experts suggest using a taping knife to smooth out the tape against the compound, achieving a flat surface.
Many professionals overlook the importance of adequate spacing when applying the compound over the tape. A common mistake is applying too much compound at once. This can lead to unsightly ridges and longer drying times. According to industry research, allowing each layer to dry properly can reduce the likelihood of future repairs. Reflect on your technique and make adjustments as necessary for optimal results.
Gypsum Board Mesh Tape Application Techniques
Finishing and Smoothing Joints After Applying Mesh Tape
After applying mesh tape to joints, it's crucial to focus on finishing and smoothing. Start by ensuring the tape is firmly in place. Apply a thin layer of joint compound over the mesh tape using a taping knife. This should cover the entire area, but avoid excessive buildup. Allow the compound to dry completely before proceeding.
Once dry, inspect the surface for imperfections. Use a sanding block or sandpaper to lightly smooth out any rough spots. Be cautious not to over-sand, as this can damage the surrounding area. Check frequently to ensure you aren't removing too much material.
After sanding, wipe the area clean with a damp cloth. Apply a second, thinner coat of joint compound to blend the edges seamlessly. Again, allow it to dry completely before sanding lightly to perfect the surface. Pay attention to reflections on the wall; they can reveal any uneven areas that need more work. The goal is a smooth, nearly flawless joint that blends well with the surrounding surfaces. It may take several passes to achieve an ideal finish, so patience is key.
Common Mistakes to Avoid When Using Mesh Tape
When using gypsum board mesh tape, many overlook essential techniques that lead to imperfect joints. One common mistake is applying the tape too loosely. This can result in bubbling and uneven joints, which detracts from the overall finish. Ensure the tape adheres tightly to the surface for a smooth application. Another frequent error is overapplying joint compound. Heavy layers may lead to cracking as the compound dries. Instead, apply a thin, even coat for better results.
Another pitfall is neglecting the surface preparation. Clean and dry surfaces allow for better adhesion. Dust and moisture can compromise the tape’s effectiveness. Some DIYers rush this step, which often results in less effective bonding. Finally, not feathering the edges properly can create noticeable seams. Smooth and blend the edges to achieve a seamless look. By avoiding these missteps, your joints will appear flawless and professional.